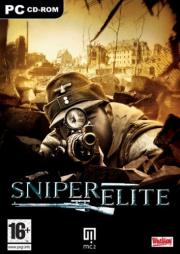
                          Sniper Elite

                Unofficial Strategy Guide and FAQ

                         by Kasey Chang

                      released May 15, 2006


1    Introduction

This section is for "what the FAQ is about" and things like that.
Feel free to skip this section.

If you like the FAQ, please send me a dollar. :-)  See [1.3]

This FAQ is about "Sniper Elite", the WW2 military shooter
created by Rebellion, published in the US by Namco.

It is also known as "Sniper Elite: Berlin 1945" in Europe.

It features a fictional, but realistic plot involving OSS agents
in Berlin denying Russians access to the German weapons research.


1.1   A WORD FROM THE AUTHOR

This is a FAQ, NOT a manual.

This USG only covers the PC Version. While this game also exists
for the consoles, this USG will not cover that because I don't
own a console.

There is an official guide from BradyGames. I have NOT read it.


1.2   TERMS OF DISTRIBUTION

This document is copyrighted by Kuo-Sheng "Kasey" Chang (c) 2006;
all rights reserved excepted as noted above in the disclaimer
section.

This document is available FREE of charge subjected to the
following conditions:

1)This notice and author's name must accompany all copies of
  this document: "Sniper Elite Unofficial Strategy Guide and
  FAQ" is copyrighted (c) 2006 by Kasey K.S. Chang, all rights
  reserved except as noted in the disclaimer."

2)This document must NOT be modified in any form or manner
  without prior permission of the author with the following
  exception: if you wish to convert this document to a different
  file format or archive format, with no change to the content,
  then no permission is needed.

  2a) In case you can't read, that means TXT only. No banners,
  no HTML borders, no cutting up into multiple pages to get you
  more banner hits, and esp. no adding your site name to the
  site list. [Small exception: a "small" toolbar with no banners
  embedded is okay. See IGN or Neoseeker for examples.]

3)No charge other than "reasonable" compensation should charged
  for its distribution. Free is preferred, of course. Sale of
  this information is expressly prohibited. If you see any one
  selling this guide, contact me (see below).

4)If you used material from this, PLEASE ACKNOWLEDGE the source,
  else it is plagiarism.

5)The author hereby grants all games-related website the right
  to archive and link to this document to share among the game
  fandom, provided that all above restrictions are followed.

Sidenote: The above conditions are known as a statutory contract.
If you meet them, then you are entitled to the rights I give you
in 5), i.e. archive and display this document on your website. If
you don't follow them, then you did not meet the statutory
contract conditions, and therefore you have no right to display
this document. If you do so, then you are infringing upon my
copyright. This section was added for any website that don't seem
to understand this.

For the gamers: You are under NO obligation to send me ANY
compensation.  However, I do ask for a VOLUNTARY contribution of
one (1) US Dollar if you live in the United States, and if you
believe this guide helped your game. If you choose to do so,
please make your US$1.00 check or $1.00 worth of US stamps to
"Kuo-Sheng Chang", and send it to "2220 Turk Blvd. #6, San
Francisco, CA 94118 USA". If you think it's worth more, send more.

If you don't live in the US, please send me some local stamps. I
collect stamps too.

1.3   VOLUNTARY CONTRIBUTION

Gamers who read this guide are under NO obligation to send me ANY
compensation.

However, a VOLUNTARY contribution of one (1) US Dollar would be
very appreciated. If you think it's worth more, send more.

If you choose to do so, please make your US$1.00 check or $1.00
worth of stamps to "Kuo-Sheng Chang", and send it to "2220 Turk
Blvd. #6, San Francisco, CA 94118 USA".

If you don't live in the US, please send me some local stamps. I
collect stamps too.

For the record, out of ALL the FAQs I wrote (over 60 at last
count) over the past ten years or so, I've received exactly 35
dollars and 8 sets of stamps, as of release of this guide. So I'm
NOT making any money off these guides, folks.


1.4   HOW AND WHEN TO CONTACT ME

PLEASE let me know if there's a confusing or missing remark,
mistakes, and thereof... If you find a question about this game
that is not covered in the USG, e-mail it to me at the address
specified below.  I'll try to answer it and include it in the
next update.

Please do NOT write me for technical support. That is the
publisher's job.

Please do NOT ask me to answer questions that have already
answered in this FAQ/guide. It makes you look REALLY idiotic.

I will NOT answer stupid questions like the ones above unless I'm
in a really good mood. If you send questions like that, do NOT
expect a reply.

The address below is spelled out phonetically so spammers can't
use spambots on it:

Kilo-Sierra-Charlie-Hotel-Alpha-November-Golf-Seven-Seven AT
Yankee-Alpha-Hotel-Oscar-Oscar DOT Charlie-Oscar-Mike

To decipher this, simply read the first letter off each word
except for the numbers and the punctuation. This is "military
phonetics" or "aeronautical phonetics" in case you're wondering.

This document was produced on Microsoft Word 2003. Some editing
was done with Editpad (editpadclassic.com).


1.5    THE AUTHOR

I am just a game player who decided to write my own FAQs when the
ones I find don't cover what I want to see.  Lots of people like
what I did, so I kept doing it.

Previously, I've written Unofficial Strategy Guides (USGs) for
XCOM, XCOM2:TFTD, Wing Commander, Wing Commander 2, Wing
Commander 3, Wing Commander 4, Privateer, Spycraft, 688(I)
Hunter/Killer. Mechwarrior 3, MW3 Expansion Pack, Mechwarrior 4,
Mechwarrior 4: Black Knight, Need for Speed: Porsche Unleashed,
The Sting!, Terranova, Fallout Tactics, Starfleet Command Volume
II, DS9: The Fallen, DS9: Dominion War, Driver, Warlords:
Battlecry, Monopoly Tycoon, Dungeon Siege, and a few others.

To contact me, see 1.4 above.


1.6   DISCLAIMER / COPYRIGHT INFORMATION

This USG is not endorsed or authorized by Rebellion or Namco.

The information compiled in this USG has been gathered
independently through the author's efforts except where noted
otherwise.

This document is based on the retail version.


1.7   HISTORY

15-MAY-2006    Initial release


2    SE General Info


2.1   THE MOST FREQUENTLY ASKED QUESTIONS

Q: Can you send me the game (or portions thereof)?
A: No.  It comes on a DVD and would take a week to download. It's
also copy protected. Buy the game.

Q: Can you send me the manual? (or portions thereof)
A: No

Q: Can you tell me how to play the game?
A: Read the manual please.

Q: How big is the install?
A: Just over 3 GB.

Q: What's the difference among the difficulty levels?
A: How easy you die, mainly, and how good the enemy is. AI on
higher level is also more aggressive in patrols. They also react
to sounds of gunfire or explosions or screams of pain. There is
more wind that affects long-range shots.

Q: What about some cheat codes?
A: See final section.


2.2  SE HISTORY

Rebellion is more famous for the console games it makes than for
PC games. Founded by two brothers, Jason and Chris Kingsley in
1991, Rebellion is best known for Aliens vs. Predator for 20th
Century Fox, as well as a Delta Force game and a Rainbow Six game
for other publishers. It also owns the Judge Dredd property and
did Dredd vs. Death in 2003.

Sniper Elite is their first PC/DVD title.


2.3   HARDWARE REQUIREMENTS

From the README file:

DirectX 9.0c required (included on the disk)

Minimum System Requirements:

   Windows 98/2000/ME/XP

   1 GHz Pentium CPU or equivalent

   GeForce 2 32Mb

   256 Mb RAM

   DirectX 8 compatible sound card

   4 Gb free hard disk space

   DVD-ROM drive

Recommended System Requirements:

   Windows 98/2000/ME/XP

   1.4 GHz Pentium CPU or equivalent

   GeForce 4 Ti or better

   512 Mb RAM

   DirectX 8 compatible sound card

   4 Gb free hard disk space

   DVD-ROM drive


2.4   HOW DOES THIS GAME PLAY?

SE is a WW2 shooter with a difference. You are an elite sniper,
working for the American OSS (predecessor of CIA) trying to
prevent the Russian NKVD (secret police), from obtaining German
weapon research. In other words, they've been fighting a cold war
before such a term was even coined!

You can go anywhere on the map, within certain limits (i.e. some
places are blocked off, quite a few 2nd story or higher locations
are not open, etc.) Good sniper spots are marked on the map, etc.


2.5   BUGS AND FIXES

The game is very stable and never crashed even once on my test
computer.


2.6   EXPANSION PACKS? SEQUELS? RELATED TITLES?

No expansion at this time, no sequels.


3    Your weapons and equipment

They are organized by the game into several categories


3.1  PISTOL

Your Walther P38 has a silencer fitted by the OSS. You start with
only 16 rounds, 8-rd magazine.

You can pick up more ammo from down enemy officers.


3.2  SNIPER RIFLE

Sniper rifle ammo can be found on enemy snipers that you killed.
You usually also get some rounds at the beginning of the level.


3.2.1     G43 (Gewehr 43)

This "sniper" rifle is actually just a regular rifle with a
scope. It is not that accurate, though it has the most powerful
round (least amount of drop due to gravity). 5-rd magazine.


3.2.2     Tokarev SVT-40

This Soviet sniper rifle is prized by the Germans as an excellent
example of long-range firearm, but not as accurate as the Mosin-
Nagant. It is also semi-automatic. 5-rd magazine.


3.2.3     Mosin-Nagant M91

The most famous sniper rifle of the Eastern Front. Wielded by
none other than Vasily Zeitzev himself, the Mosin-Nagant gained
notoriety as one of the most effective sniper rifles. The problem
is its bullets are NOT as powerful as the SVT or even the German
G43, thus you need to put in more compensation for bullet drops
and windage correction. However, in the right hands, it is
DEADLY. Also 5-rd magazine.


3.3  SUBMACHINE GUN / MACHINE GUN

Most enemies (except the snipers) will carry a MG or SMG, which
means ammo should be plentiful if you ration yourself. On the
other hand, most corpses only yield about 5-10 rounds. So you
should limit the use of your MG/SMG.


3.3.1     PPSh-41

The Russian equivalent to the American Thompson submachine gun
(i.e. the Tommy Gun), it has a drum magazine and holds up to 71
rounds. However, it's also wildly inaccurate.


3.3.2     MP-40

The MP-40 is one of the better submachine guns in WW2, short,
easy to make, reasonably accurate, and puts out a lot of fire. It
has a 32 rd magazine.


3.3.3     MG-42

The MG-42 is one of the best machine-guns in WW2, with tremendous
rate of fire (up to 3X of any allied MG). Its ammo is quite rare
though. In this game you can go Rambo by firing this from your
hip. Each "belt" is 50 rds.


3.3.4     RPD

The Soviet equivalent of MG-42, it's recognized by a "frisbee"
magazine on the top of the gun, as well as a bipod. You can go
"Rambo" with this MG as well, but its ammo is also quite rare.


3.4  HEAVY WEAPON

There's only one.


3.4.1     Panzershrek

The German version of the bazooka, it fires a shaped charge
that'll defeat almost any tank. Ammo is extremely rare, and
you'll need almost every round you get.


3.5  THROWN EXPLOSIVES

This game has a lot of explosives to chuck around, and you'll
need most of them.

To throw a grenade, select the item, then hold down left mouse
button to get the throwing aim. Most mouse until desired impact
point is chosen. With left button held down, tap the RIGHT mouse
button to throw the grenade. (It's complicated, I know)


3.5.1     Frag Grenade

The "pine-apple" style grenade. Enough said.


3.5.2     Stick Grenade

I.e. the German potato-masher. This allows you to throw it really
far, but doesn't explode that hard.


3.5.3     TNT

A bundle of TNT. Can be throw, then detonated with a nicely aimed
bullet. Great for long-range demolition (make sure you are at
least 30 meters away, or you'll take damage!), and even the
occasional tank plinking. Throw the TNT bundle (yes, you can
throw it just like a grenade) to the spot, then retreat and shoot
it.

You can pick up your TNT bundle for reuse.

TNT can also be dropped at a certain location.


3.6  OTHER EXPLOSIVES

These must be set, and cannot be thrown.


3.6.1     Time Bomb

A bundle of C4 (cannot be detonated by a bullet) with a timer,
can be set between 1 to 30 minutes. Must be dropped at the right
location. (You'll see big white outline of a time bomb when you
get to the right spot).

You can pick it up and reset the timer if you change your mind.


3.6.2     Trip-wire grenade  (i.e. tripmine)

The trip-wire grenade is basically a grenade with trigger
attached to a trip-wire. It's powerful enough to kill trucks and
cars and half-tracks, but not enough to kill tanks. It'll also
kill LOTS of soldiers if they are in the vicinity.

To set one, select it, then plant it, pull back to a spot, plant
the other stake. The wire will be in between. When anything
touches the wire, kaboom!

Yes, that means you too, or enemy bodies blasted by one mine.
I've seen it happen. I had two mines within 3 meters of each
other defending the exit of staircase and corridor. One guy
walked up, boom! His body was propelled and dropped right onto
the wire of the 2nd grenade.

To prevent one guy from triggering multiple grenades, plant them
at least 5 meters apart, preferably 7-10 meters apart.

NOTE: If you are prone, you may have problem setting trip mine
between two different elevations, like road and sidewalk. As soon
as you back onto the sidewalk, the wire disappears and the mine
"cancels". Crouch instead.

Once set, trip-wire grenades can only be detonated (by a
grenade).


3.7  OTHER ITEMS


3.7.1     Rock

Yes, you have a piece of rock in your inventory. It's great for
making noises for enemies to investigate, giving you a chance to
sneak or to ambush the guards.


3.7.2     Bandage

Usually found by frisking bodies, bandage heals about 25% of your
wounds (Your "man meter", red = damaged)


3.7.3     Med-pack

Med-pack is a full first-aid kit. A use will fully-heal any
damage you have suffered. Try not to use it unless you have a
surplus of med-packs.


4    Various Tactics


4.1  GENERAL TACTICS


4.1.1     Grab every bit of ammo and equipment

Your starting spot often has some extra equipment for you to
pickup.

Look for open boxes and such with lots of ammo and such. You want
as much ammo as possible, even if you don't have the gun for it
yet.


4.1.2     Check every body. if possible

Each body may yield a couple rounds of ammo, bandages, grenades,
and so forth.

However, if the body is exposed, move the body to a secure
location before doing detailed frisking.


4.1.3     Go from cover to cover

Stay in cover, even if you have to go the long-way around. Stay
next to walls, only peek around corners, and so on.


4.1.4     Check the skyline for snipers

Sniper will search their assigned sector for enemies, and engage.
Once he fired, he will hide, reload, then reacquire and reengage.
This cycle can take 10-20 seconds. Thus, if you got shot at, find
cover quickly, and prepare to find him as he pops back out to
reacquire.


4.1.5     Pay attention to sound

Footsteps nearby is a sure sign enemies are coming closer.


4.1.6     Consider wounding instead of killing

Shoot a guy in the leg or in the chest. He'll writhe on the
ground, and if there are any more hostiles alive they may go to
his aid, giving you a chance to score a two-for-one.

Another possibility is shoot a guy in the arm or shoulder, or
just hit close to him. He'll get spooked and move away from his
cover.  Thus giving you time to move to another position, or to
plant a surprise if he comes to investigate later.


4.1.7     Wide angle view

Stay in normal vision most of the time, only use the scope or
binoc when you need to get a detailed view of a specific section.
High mag also means reduced field of view. Which means you may
miss an enemy coming at you.


4.1.8     "Instant switch"

A good way to play is to leave the MG/SMG armed. If you need the
rifle, hit space to bring up the scope. Hit space again will
immediately switch you back to the MG/SMG. This is a lot faster
than the normal weapon switch, which can take up to 5 seconds as
you must put away one weapon and pull another.


4.2  MOVEMENT TIPS


4.2.1     Almost always crouch, sometimes prone

Crouch gives you almost the same forward speed as stand-up run,
but much stealthier.

Only stand up if you need to peek into a window, or if you are
carrying someone or a dead body.

In dangerous areas, go prone.


4.2.2     Clear a room with grenade(s)

Grenades are the best way to clear small rooms. Lob one through
the window or door and watch the fireworks.

On the other hand, grenades do have limited range and may not
kill all enemies in a large room. So follow up with your MG/SMG.


4.2.3     Try to expose your RIGHT arm first

As that is your shooting arm. If you expose your left arm first,
then shoot, you may end up shooting the wall.


4.2.4     Displace and shoot.

Relocate after firing one or two rounds. Every shot gives the
enemy a vector to your location. Even a covert kill provides SOME
clues to the enemy. Thus, displace after every shot is best.


4.3  CLOSE QUARTERS COMBAT TACTICS


4.3.1     Get close

Preferably, close enough that you can't miss, which means
directly in the guy's path, but behind him.


4.3.2     Go for headshots

One shot in the head is an instant kill, compared to 2-3 into the
torso.


4.3.3     Pistol for covert kills

Your pistol has a silencer, really. It's quiet, and if you get
close and aim for the head, it'll put a guy down in one shot.

If you have to aim for the body, do triple-tap (three shots at
the torso).


4.3.4     Use the right gun

Sniper rifle is not the weapon for close-quarters combat. Get a
MG or SMG.

In a pinch, a pistol will do, but you lack ammo for those.


4.4  COVERT TACTICS


4.4.1     Silent Kill

Use the pistol. One shot in the head will put the guy down.
Remember the cursor turns red when it's over the enemy.


4.4.2     Hide the body

If enemy patrol the area regularly, you should hide the body by
picking up the body and dumping it elsewhere.

In fact, hide the body before doing detailed search of it.


4.4.3     Shoot the grenade on the enemy?

Supposedly, it's possible to hit the grenade hanging off a
soldier's belt. And if you do that, the group goes "kaboom"!
Thus, you don't even need to "throw" that far!


4.4.4     Shoot truck

As trucks can go boom quite easily, the more people standing next
to the truck, the better when it goes boom.


4.4.5     Shoot during sound of artillery strike

If there are frequent artillery strikes in your area, shoot when
the strike hits the ground will mask your gunshot sound.


5    Hostile Forces

Here's a quick summary of the forces you can encounter


5.1  SOLDIERS

Note: all soldiers react to noises, esp. gunshots. Displace after
each shot, or risk getting surrounded.


5.1.1     NKVD Officers

Officers are armed with a machine gun such as RPD / MG-42, and
have dogtags for you to collect, as well as other stuff.


5.1.2      NKVD Grunts

They are armed with the drum-mag submachine guns, and they are
deadly at close-range. Usually grouped with an officer as a 3-4
men patrol group. When one member is attacked, the entire group
will seek to flush out the shooter.


5.1.3     NKVD Snipers

Snipers are extremely deadly. You can tell they are around as
they fire one shot at a time, and you better take them out first
before they get you. Many can even go prone! Most hide on
rooftops and shoot one shot at a time. They will hide, reload,
then reemerge to shoot. So figure out where they shot from, then
look at the skyline for them to reemerge.


5.1.4     German Officer

Usually an SS officer? Pistol and/or grenade.


5.1.5     German Grunt

Armed with MP-40 or MG-42


5.1.6     German Sniper

Armed with a G43 and maybe grenades.


5.1.7     Resistance Fighter

Dressed in whatever they can scavenge, armed with a myriad of
weapons.


5.2  TANKS

Two tanks in the game, both have machine gun AND main cannon. The
main cannon will kill you dead, whereas machinegun will just hurt
you.


5.2.1     Tiger I

With a 88mm adapted from an AA gun, this was one of the best WW2
tanks ever produced. Its main problem was the weight.


5.2.2     T-34

T-34 is one of the best known tanks of WW2 mainly because the
Russians built so many of them. Simple to make (for a tank),
reasonably fast, and later upgraded to an 85mm cannon, this tank
(and the Russian winter) won the war of attrition against the
Germans in WW2.


5.3  OTHER VEHICLES


5.3.1     Armored car

It's all black with 6 wheels. It has a nasty machine gun. Kill it
with a TNT bundle, sniped.


5.3.2     Truck

Trucks are everywhere. Fortunately, trucks also have a gas tank
on the LEFT with a gas cap that can be easily sniped.

Trucks are pretty easy to kill, at least on easier difficulty
levels.


5.3.3     Motorcycle w/ sidecar

Very easy to kill. Hose it with machine gun, or put a trip mine
across its path.


6    Campaign Walkthru

There are a total of 28 missions, many of which are grouped
together into "operations", so to speak. The game wasn't always
clear on the name of the mission, and the name of the operation.

For the purpose of this guide, each mission takes place on a
single map (i.e. a single location). The savegame's "name" is
used as the mission name.  Missions are grouped together into
operations (or mini-campaigns).


6.1  KARLSHORST


6.1.1      Meet the informant

Briefing: Infiltrate the town, rendezvous with the local
resistance agent.

Situation: Some buildings, some snipers... Small groups of NKVD
grunts and an officer or two are all over the place. They are
concentrated around the roadblocks, but they also appear in
various places. There are two tanks running around. One German,
one Russian. There's a German supply depot to the NW, but it's
not necessary for you to approach it.

Goal: Rendezvous at location specified.

Suggested tactics: Stealth and long-range kills are your friends.
As the tutorial suggests, cover open ground prone and in quick
bursts. If you take a shot, change location immediately as
enemies can and will sweep for snipers.

Walkthru: Head north, keep to cover as much as possible. You may
spot a guy to the east. You can sneak around him or try to take
him out. It doesn't matter if you succeed or not, displace, then
worry about collecting your trophy.

Your next enemy would be to northwest. Two choices. Once
possibility is to get into the riverbed, and emerge in the next
building, but often enemy patrols may hear you shuffling around.
Another possibility is to NE across the river, then directly
west. There's a patrol to your west near the dead car. Use pistol
to shoot him in the back. You'll see more enemies to north and
northeast. Take care of them, get through the ruins, and your
path should be clear to the rendezvous.

Find the building, then go around. There's a slope leading up to
upper level, your contact is there. Walk up to trigger the
cutscene.

Cutscene: you rendezvous with the resistance agent. It appears
that his colleague was captured by the NKVD. You need to locate
him, then rescue him, and take him to a resistance safehouse.

Goal: Rescue resistance fighter

The resistance fighter is being held in a facility to the west,
just south of the depot. Remember, the enemy tank patrols there,
so try not to get its attention. In fact, don't go that far west.
Go back to that building with camo nets, go through the tunnel
and back into the river bed. Look for the slope that'll take you
south, up and out of the place, but look for a sniper right at
the exit on rooftop. Take him out when you see him. You'll
attract some fire, so go back through the tunnel and head west,
and hide when the tank comes along. Then head south. Or you can
tough it out and try to go through. It's up to you.

Get close to the building. If you approach the building from NE
you should be able to see the guard inside. Take him out with a
long shot. Continue infiltration and clear the room.

Goal: Deliver fighter to safehouse

Grab all the grenades and ammo and such in the area. Do NOT go
near the other door. There are enemies that way and if they see
you they'll rush you. Once you grabbed all the ammo, go prone and
go back north, leave the guy there for now. Make sure "plaza" you
came through (just North of the room) is still empty of enemies.
If it is, carry the guy and stash him in the corner just East of
the door you went through. If not. NKVD will rush the room and
you need to play "defend the Alamo" for a while. Your ultimate
objective is to reach the staircase to your NE. You can cross two
blocks without any risk of exposure that way. The problem is
surviving the trip.

With your buddy in a secure location, carefully sneak out and
look to SE, and should spot more NKVD. Engage them, and eliminate
this 3-men patrol. You should be able to reach the stairs
unchallenged. Climb up and go into the corridor. Then slowly
climb down the other end. Stash him in a good spot.

There's another 3-men patrol you need to take out before you can
reach the safehouse. You have two choices. You can run for it, or
you can take out the patrol first. I prefer the proactive
approach. Slowly, prone, sneak out and look to NE/N and you
should spot them. If not, pick up the guy and run East, slightly
south, into the ruins, and left turn into the safehouse. Your
arrival triggers a cutscene.

Cutscene: resistance leader thanks you for saving his friend.
You're welcome to any supplies they grabbed.

Grab as much as you want. Russians by this time may be assaulting
the safehouse. Help the resistance, eliminate the Russians.

Goal: Ex-filtrate

It's time to exfiltrate. Head for exfil point carefully, as you
WILL run into a sniper or two. Watch the rooftops, esp. when
you've been shot at.

When you're one block away, you'll see this Soviet T-34 tank. You
can't get past it as it doesn't move. much. You also trigger a
cutscene.

Cutscene: you can kill the tank by blowing up the external tank
cap on the right rear of the tank. The cap is quite visible.

It's not that exposed, so you'll need to be a good shot. And
watch for soldiers nearby who will react to gun shots, but an
exploding tank should take care of them as well. Watch for a
sniper in the area though.

Once you've taken care of the tank, and eliminated the rest of
the roadblock, keep sneaking, and you'll be out, and that ends
this mission.


6.1.2     Supply Raid

Briefing: assist German resistance (GR) in eliminating the NKVD
guards holding an ammo dump, and a tank park. Get the ammo dump
to resupply, and assist the team in destroying the tanks by
covering them.

Situation: Some buildings, few snipers, mainly at ground level.
Small groups of NKVD grunts and an officer or two are all over
the place. Snipe the pillboxes first, take out any guards that
investigate, then help the rebels take the ammo dump (to east).
Then sneak in and do the same to the tank park (to west). Deal
with any other objectives that appear. Then exit the map.

Goal: Approach the pillboxes as directed and empty them. Two are
specified on the map at the ammo dump.

Collect all the stuff next to you as you start. You'll need the
TNT later.

The first one is quite visible, though the guy inside may not be.
Remember to hold your breath, and try to time the shot in time
with the falling artillery to cover your shot's sound. Also
remember to account for bullet drop.

Once you got both pillboxes, you get a new goal. Goal: Cover GR
forces advancing on the ammo dump.

The rebels will rush in and shoot all they can, but they need
cover. Head in and start killing every Russian you can spot. Kill
at least two Russkies (the more the merrier) to satisfy the next
goal. Arm submachine gun and run in with them, shoot every NKVD
on sight.

NOTE: If you want to save yourself some trouble later, get behind
one of the GR fighters during the fight, and "accidentally" kill
one of those holding a Panzershrek. Once you do, grab the
Panzershrek. You can use it later. Remember to grab more ammo
from the down guy too.

With that complete, it's time to move onto the other goal.
Eliminate guards at the tank park. However, grab all ammo and
perhaps the MP40 at the ammo dump. It's more accurate than the
Russian sub-machinegun.

Goal: Approach the pillboxes as directed and empty them. Two are
specified on the map at the tank park.

Go ahead and run toward the other part, but stop before you reach
the big bend. Go prone and sneak. While the corner has a nice
spot for sniping, it's occupied. Head into the door carefully and
watch for a NKVD officer hiding there. Try to get rid of him
silently. Then use that spot to get rid of the guard in the
pillbox.

Now you get to decide. Go end-run, or go through the middle. If
you want an end-run, go right and follow the dead street cars to
the far corner. Else, there's a door in the middle, which leads
you to a spot where you can see the pillbox, though it doesn't
give you a very good spot to shoot. The far one is not that much
better.

Any way, I prefer the end-run, as it also let you see the guards
easier. Use pistol to get rid of the closest one at the tent,
crawl past the tank and use that as cover to take out the rest of
the visible guards, AND the one in the pillbox. Once you got the
pillbox, next objective starts.

Goal: Cover GR forces as they destroy the tanks.

The rebels should attack now as they put a panzershrek into each
tank AND fight Russians. Help them by snipe each and every
Russian, as 3-4 will start appearing out of the side streets.
Help the Rebels get rid of them. Don't get too close to a tank as
the rebels won't shoot them if you're too close. they don't want
to kill you. Help them clear the area.

When the area is clear of NKVD, collect ammo, and approach the
tents. Two of them have ammo crates, which you will need ASAP.
You also trigger a cutscene.

Cutscene: ammo dump is under attack by Russian forces with armor
support. Help the rebels beat back the Russians.

Goal: Destroy the Russian force (with tank) attacking the rebels
at the ammo dump.

Feel free to run back, as there shouldn't be any enemies in your
way. Russians have multiple infantry along with a Tiger tank.
Unfortunately, you have NO panzershrek. (Or perhaps you DID
manage to obtain one?)

If you don't have panzershrek: Concentrate on killing infantry
first. You best bet is to hide at a pillbox (maybe the southern
one) and use that as cover to kill Russian infantry, and hope the
tank won't kill you in one shot. Once all the infantry's clear,
throw TNT behind the tank (must be behind, as front won't do
anything). Then RUN for cover, and snipe the TNT from a safe
distance. Boom! The tank goes bye-bye.

If you *do* have a panzershrek: then hide and kill the tank with
a flank shot. Then kill the rest of the Russian soldiers.

Now head to the exfil point back at the tank park. However, watch
out as you may run into additional Russians. Once you get there,
mission ends.


6.2  ASSASSINATE BORMANN

Briefing: Bormann is cooperating with the Russians, and cannot be
allowed to defect. He knows too much. He is hiding in the
Reichstag, very heavily guarded. You don't really want to be
detected heading in. Try blowing up some trucks as diversion. The
less people escorting him, the better chance you have of killing
him when he leaves tomorrow. You may be able to sneak in when the
Russians launch an attack at about 2330 hours, as they believe
there's a stash of Heavy Water (needed for atomic research) at
the Reichstag.


6.2.1     Reichstag

Situation: Reichstag is VERY heavily guarded and patrolled, with
pillboxes and guards all around. Sneaking in IS possible, but
won't be easy.

Goal: Get inside without triggering any alarms

In front of you is a walking guard. The best way to ambush him is
to get behind the truck to your NW and keep it between you and
him. Save the game. When he comes around, and turns around, sneak
up behind him and kill him with the pistol.

Look at the other guard with your binocs. While he's looking the
other way, sneak up to the hole in the wall and get inside.

Goal: Blow up the trucks to reduce Bormann's escort

This one may be tougher, and you may want to wait until the
Russians attack, thus attracting the attention of the patrols.
There's a sniper on the roof and he'll kill you if you don't get
rid of him first. But shots will attract attention, so wait until
the Russians invite even MORE attention.

Once that happens, kill the sniper. Then plant at least one
timebomb (set to 30 minutes) at the 2 trucks. Goal complete!

Goal: Reach the statue in the back of Reichstag to retrieve
secret document

Get into the trench around the building. You may want to go
around to the east to avoid the battle, as the Russians are
attacking from the west. If you go around on the west side, you
risk getting shot at by Germans. However, on the East side there
will be Germans as well, and the trip is a lot longer.

Reach the side of the statue AWAY from the Reichstag to trigger
the cutscene.

Cutscene: you retrieve the document.

Keep moving toward that AA gun. You'll also get a new objective
and a cutscene.

Cutscene: That AA gun is slaughtering the Russians, and the tank
can't seem to engage it. You're trapped inside unless you break
the stalemate. By killing the German defenders.

Goal: Eliminate the AA gun and the German unit defending it to
help the Russians break in, causing more chaos.

Watch out for another sniper on the roof covering the north
courtyard, as well as multiple Germans patrolling the area. Snipe
the AA crew by shooting through the peephole. Yes, it can be
done. Then shoot all the defenders. Hide behind the hedge wall.
Blow up the truck by shooting the gas cap (or use a grenade, it's
up to you). You probably need to destroy the truck to fulfill
this goal.

Goal: Exfil to the west toward Brandenburg Gate.

Take the smaller exit (the one almost at NW corner). There are
two Russians guarding it. Take the sniper rifle and go on top of
the mound of dirt, and shoot the guy running away and back. Watch
out as he's got a RPD, which is a nasty MG. Then arm pistol and
head over and shoot the other guy just behind the mound of
debris. Continue and you'll exit the mission.


6.2.2     Brandenburg Gate

Briefing: Bormann will arrive in less than 15 minutes. You have
to get inside to meet with the other OSS agent to obtain
additional supplies and intel before his arrival, without being
seen by the guards. Then work on the ambush.

Situation: This is an ambush, so you should work on ambush as
much as possible. Drop TNT in strategic locations, as well as
tripwire grenades, can be very helpful. Initial stealth is
needed, and for getting away.

Goal: Meet up with the OSS agent.

You start just outside the gate, to the north. Head for your
right (southwest), as there are 2 guards to your left
(southeast). Head inside and sneak your way to the meeting point.
Or, if you feel aggressive, head in there and kill both of guards
without raising the alarm.

Move carefully, but speedily, as you must leave yourself enough
time to plant the ambush. Don't kill any one except as a covert
kill. Get to the OSS agent who'll give you a new SVT rifle, among
other goodies.

Continue to head south toward the entrance. Try to sneak behind
the patrol, kill only if absolutely necessary. Head for the sub-
objective and go through the hole in the wall. Get inside, turn
right, then another right. Plant a stick of TNT right at the left
corner, beyond enemy's view, but almost into the street. Bormann
should be arriving ANY second now, quickly go back the way you
came, through the hole in the wall, and turn right slightly and
head for more cover. Get to a place where you can spot your TNT
but not too close. By this time Bormann's convoy should be here.
New Goal.

Goal: Kill Bormann

Sub-goal: kill Kolekov, his NKVD contact

When ready, shoot that stick of TNT you dropped at the corner.
BOOM! That should kill just about everybody on the premises,
including the two guys you need to kill. If not. start tossing
grenades into the mix, and shoot any survivors.

Goal: Exfiltrate

Now it's time to boogie. If you want, shoot the rest of NKVD
guards, but it's not necessary. Head back to where you got the
rifle, and that's the exit point.


6.3  EXTRACT AGENT

Briefing: We have an agent in the German science group. However
his contact has not reported in. Get in there, help GR hold off
the NKVD, and then locate the contact. We need to extract that
agent ASAP!


6.3.1     Missing Contact

Goal: Take over the "bridge"

Grab the stuff next to you first. When ready, head forward
(prone, of course) and start picking off the soldiers on the
bridge. You need to find the stairs that'll lead you up. Once you
get inside, plan tripwire grenades right at the entrance, then
another in middle of stairs. Then another on top of the stairs
(after killing all the guards first, of course). If you want,
plant one more at the door to bridge.  Keep the rest of the
grenades. Once you killed all the guards on the bridge, goal is
complete. And you get a new goal.

Goal: defend this location against NKVD counterattack.

Back up and stay prone, get behind a set of sandbags. Arm sub-
machine gun. A bunch of NKVD will rush the bridge from below. Try
to shoot them from the bridge (you'll need to kneel up) but it's
okay if you didn't kill anybody below. Listen carefully as a
bunch of NKVD will rush up the stairs. Let's hope the traps you
laid for them will get most of them. Hose the rest with your sub
machinegun. Kill all of them, and get a new goal

Goal: Go to the hidden ammo cache

Head back down, and it's time to look at the original rendezvous
location (to NE). Head for the ammo cache. Kill any one in your
way. Take the small alley and carefully move in. Expect to see
heavy opposition, as you'll see another bridge and more bad guys.

When you're at the cache, it's at the bottom of a building. Chuck
a grenade inside first. Boom! Toasted Russian. Go inside and
claim the goodies, including a Panzershrek (bazooka) and at least
2 rounds. You'll need to use it soon. Grab all the goodies and
heal any wounds. Time for next goal.

Goal: Go to rendezvous point

Move slowly from the "bunker". Exit the alley toward the next
goal. A truck should come toward you. Get behind it, and kill
everybody getting off. Then get out the Panzershrek and kill the
T-34 following it.

Consult the map. You need to cross this street into the alley
across, but there may be a few NKVD approaching. Kill them, and
get into that alley. Continue, and you'll find a building with an
open door. That's the rendezvous point. Head inside to trigger a
cutscene.

Cutscene: you move the cabinet aside to reveal the drop point.
And a message: Rendezvous moved 2 klicks north.

Now you need to make your way across hostile terrain again.
Fortunately you've cleared most of this already, but watch out
for additional Russkies. As soon as you get out of the building,
turn back and kill a Russky that spawned inside. Continue down.
You should spot a truck. Looks like Russkies are pilfering art.
Toss a grenade to kill them all. Run in with your MG and kill any
survivors.

Continue to rendezvous point exit. To next part of the mission.


6.3.2     Meet the Courier

Situation: the courier had stated that the meeting place was
moved north. You have to locate the courier. Or what's left of
him.

Goal: Locate the courier

Grab all the goodies at starting point. Arm pistol. Head out. You
should see a dead truck. Go under it, and you should see a NKVD
with his back to you. Shoot him in the head. Then shoot his buddy
one block down with your sniper rifle. Do NOT approach this next
guy as one guy will emerge from side street with grenade, and one
hit can kill you. Turn LEFT and watch for a sniper on the balcony
of a destroyed 2-story building. Kill him.

Back to where you killed the 2nd guy, approach carefully, even
toss a grenade into that alley. You don't want that guy to get a
grenade off. Two or three more MG equipped Russkies will
approach. Kill them all.

Approach the rendezvous point carefully. You should see a wrecked
car. The courier's next to it. dead. You flipped him over and
found a map.

Goal: head toward the square

Take whatever route that is convenient toward the next objective.
However, arm Panzershrek, as a tank will soon approach and you
don't want to be looking down its cannon barrel! And don't get
too close as back blast CAN kill you. Kill any infantry escorting
it as well.

You're at a large street with a bridge, burned trams, a few dead
trucks. Watch for a sniper on the uppermost floor, upper left
corner of a building. You'll know which one. Kill the sniper.
Turn around and kill a MG-42 guy coming from your right.

Go there, which is toward the exit. Carefully approach and you'll
find a couple Russkies around an armored car. Toss a grenade or
two at it, and boom! The armored car's history, and so are the
Russkies. Kill the rest, and head toward the exit point to end
the level.


6.3.3     Infiltrate the Square

Situation: The square is heavily guarded. An OSS agent will brief
you on the updated situation. However, multiple Germans are now
hunting you. Try to pick them off quietly and keep moving, else
they will surround you and flush you.

Goal: Meet the OSS contact

Approach carefully, pickup any goodies at the starting location.
Head toward the rendezvous point. You should spot a cluster of
hostiles. Fix that with a grenade, and pick off the rest.

Continue. If you come to a big building with front completely
gone, watch for a sniper on 3rd floor. Take him out, plus any
other attackers.

Follow the pointer to an empty square. You should see a dead T-
34. Your OSS contact is behind that. Go talk to him.

Goal: Kill German officer. GR needs his uniform and papers to
prepare a truck for the agent's extraction.

If you killed the sniper, you'd realize the German officer is
right underneath. So head back (doubt there's any more hostiles),
except for the random German patrols. Sneak in, and kill the
officer with a pistol shot in the back of the head. Grab his
corpse and run back to the rendezvous, but this time, turn left
then right and down into the cellar. Drop the body there.

Goal: Get to the French Cathedral

Now just head to the exit point, quietly is preferred. Shoot at
any one that saw you. When you reach the exit, the mission ends.


6.3.4     French Cathedral

Situation: The French cathedral has three buildings. Our agent is
in one, and there's a tower on the SE corner. Take that tower,
and protect the agent for extraction.

Goal: Get inside the cathedral walls

Grab all the goodies, then run for the ruins to your left front,
and climb up into the corner. There's a passage to the left
(where a dead body is), and that leads to an exit into the
cathedral courtyard.

Goal: Get into the tower to cover the agent's extraction

Two soldiers patrol the tower building, and you need to get there
before the clock strikes xx:30, as there will be an air raid by
the Russians and the agent will run for it at that time. However,
that doesn't mean you have time to waste. Your time should be
spent on planting some traps using those tripwire grenades. I
would plant 1 across the main steps, in the middle of the
staircase. Plant another tripmine across the bottom. Then plant
another two across the NE corner, between the staircase and the
staff car. At least 15 meters apart. None for the NW corner. The
air raid will take care of them. Keep planting more, but don't be
seen by the guards patrolling. Leave one tripmine for yourself.
You may also consider leaving some timebombs, and TNT about that
you can shoot for further kabooms.

Now get up the steps and into the church. Remember, you need to
leave yourself enough time for you to reach the top!

Once inside, head for the top. There's a break in the middle.
Once in the 2nd staircase, plant the last tripmine across the
entrance. This is your security.  Now crawl your way to the top,
as fast as you can. You need to get into position before the time
is up. Once you're there, you get a cutscene: you send a mirror
signal.  Now just wait.

Goal: Protect agent, protect truck

Then you get the cutscene where the agent runs and gets out,
Germans in hot pursuit.

Shoot the two Germans chasing the agent. The agent will retreat
to the statue in the middle. Cover him by taking out everybody
coming close. Go prone and get the sniper rifle ready. Look
toward the far side, where the truck is. Multiple hostiles will
enter the area and cluster around the truck. However, the air
raid should start and boom! The truck will explode, taking out
all three. Watch where the agent is shooting and kill any Germans
in that direction. Enemies will come in three directions. the Far
side (NW corner), Near side (NE corner, where you booby trapped),
and the middle, down the stairs (you also booby trapped). Keep
shooting Germans until the truck arrives.

When the truck arrives, the agent will run for it, but 2 more
Germans will run down the stairs. KILL THEM QUICKLY or they'll
disable the truck!

When the agent gets in, cover the truck against more Germans.
Some may get into a staff car. Shoot the staff car quickly, but
it's okay if you didn't get many hits.

You may also notice a sniper or two from across the courtyard. If
you can kill him, go ahead. Else don't worry about him.

When the truck leaves, your goal is complete. Now it's time to
boogie.

Goal: Make it to Western ruins

Arm sub machine gun and crawl down the stairs, kill any Germans.
One should have triggered the tripmine you left behind, kill the
other. There is a MG-42 in the "break" of the staircase, around
the back on a table. If you prefer the MP-40, then forget about
it. When you reach the bottom, kill additional soldiers that
attack. Now you need to cross over to the Western ruins. Enemy
reinforcements, at least 6, are approaching from behind the
cathedral, and you don't want to be in open ground when they
arrive.

RUN for the western ruins, and go prone, and start to pick off
the approaching enemies one at a time. When they get close, hose
them with MG / SMG. Keep displacing so they can't corner you.
Once you got rid of them all, it's time to exit.

Goal: Head for exfil

Run up the ruins and retrace your steps but now it gets nasty, as
at least 6 Germans want to stop you and are between you and the
exit. If you are fast, get to the exit, but do NOT head down.
Instead, climb the boards and head UP one floor, and immediately
go prone. The enemy will climb up, but not to your level, and you
can drop grenades on them and kill them all. Kill any survivors,
and head for the exfil point.


6.3.5     exfiltrate the square

Situation: The Germans are NOT happy! A bunch of patrols are out
for your blood. Run for some goodies left behind by the other
agent, and kill more enemies, then make your way out.

Goal: Kill enough Germans to delay pursuit

Grab initial goodies, then RUN to the goodies point and grab all
the good stuff. Then lay trip mines, 10 meters apart, on BOTH
alleys, 2 each, and hurry up. Then go hide under the tank. Shoot
survivors of the trap. Go hide in the cellar for a while. Emerge,
and shoot any survivors. Should kill like 6 or them.

Goal: Break contact by reaching your hidey hole

Your hidey-hole is where you killed that German officer before.
If you've done your job, there should be no one between you and
the hidey-hole. Low-crawl over, enter the room, and turn right
until you see a hole in the wall. Get inside, then make a right
turn and get inside the 2nd room. Turn around, arm pistol, and
just WAIT. If you don't make any noises, the patrols will give
up, and your goal is complete.


6.4  KARLSHORST REPRISE

NOTE: From here on my notes on the individual goals were
incomplete. However, the walkthrough is done exactly as the goal
order, so you should be able to follow it with no problem at all.
Besides, the enemy move around a lot.

Briefing: We need to take out this fuel depot controlled by the
NKVD. Get in there and plant time bombs. Also, we need the
codebook from the commander. Grab it after he returned to the
base.

Situation: lots of guards, possible to do this without firing a
SINGLE shot until almost the end.

NOTE: DO NOT crawl under the burning tanks. You'll die.

NOTE: This is NOT the only way to do it. You can kill guards and
hide their bodies if you want, just make sure it's a silent kill.

Avoid the towers, follow the red arrow on the map and head toward
the entrance on the left side.

You should see this guy standing on top of the western bunker
with sweeping lights covering the entrance checkpoint.

Supposedly it's possible to stay on the hill and move behind the
guy so you can pop him with a pistol, then dump his body just
outside the camp so nobody will notice. On the other hand, an
alternate method is to low crawl as close as possible until you
slid off, then crawled to the wall. That attracted his attention,
and with him looking the wrong away, you can avoid the lights and
crawl right through the entrance.

Go north and then east to the ramp, and wait until the guard that
patrols that section walked past, then climb the ramp, and
crawled to the western edge inside the fences, and when nobody's
looking, plant the time bomb set to 30 minutes. Hug the western
wall to the northwest corner. Another guard is to northeast, so
go through the broken ground and just crawled to just under the
lip of the platform. Avoid the guard to the middle and head east.
Follow that all the way to a ditch and the other tower. Nobody
should be looking, so just crawl toward the control panel, and
drop your next timebomb (set for 3-4 minutes less) at the
designated spot.

Now crawl under the tank and wait for the commander to reach his
office. Remember there is at least one guard in the corridor,
possibly more.

You'll get a cutscene when the commander returns to his office.
When that's done, wait a little more. The guards are about to
start a patrol. Just wait. The guard will come out toward you,
then turn to face outside. When he does, crawl out, get behind
him, and put a bullet in his head. Then crawl in there and kill
the 2nd guard. Then crawl in and kill the commander, and grab the
codebook at the table. (Just approach the table).

NOTE: If the commander saw you, all the guards start to prepare a
reception to make sure you don't leave the place alive, so try
not to give him the chance!

Quickly go back the same way you came, and crawl for the two
houses that are slightly raised above the ground, and get under
it. Then keep crawling toward the entrance. A guard may be near
the entrance.  He usually turns back and points gun toward the
commander's office and go prone. If you're under the houses,
you're already past him, so forget about him. Keep the guard
shack between you and the light. Crawl past the entrance, and up
the hill. All the guards are looking INTO the camp, nobody is
looking out. Crawl your way to the exit point, and enter the
tunnel, and you'll get the cutscene of the entire fuel depot
blowing up!


6.5  THE SCIENTISTS

Briefing: a group of German scientists captured by the NKVD will
be moved east. OSS is sending a retrieval team in but they need
more time. Clear the U-Barn station so the team can arrive
unmolested, then intercept the scientists so OSS can grab them.


6.5.1     U-Barn station

Situation: eliminate all the NKVD around the station, which is
underground, with multiple entrances. Rely a lot on tripwire
grenades, as they are excellent booby traps and can guard your
back.

Goal: Take out all NKVD defenders in the area about the U-barn
station

First, turn back and collect all the goodies behind you. You may
want to plant a trip mine at the bottom of the staircase in case
you have some uninvited visitors.

Look across the river and take aim at the truck's gas tank cap.
One hit and Kaboom! Taking out 3 guys.  Turn right toward the
bridge, and take out the sniper on the bridge. Turn left and look
at the other bridge. Then beyond it, and look at the roof.
There's a sniper on there. Take him out too. Look for another
NKVD across the river, kill him.

Now you can come out (don't hit your trap if you planted it, just
"jump" from 2nd story). Head for the station entrance, but beware
of 3-4 NKVD guys coming to check the commotion. Take them all
out.

Turn left and go to get all the goodies in that sub-goal on the
map at that rowboat.

You can search all the bodies now, as you won't be bothered for a
while. When you're done searching, lay at least three tripmines
on the bridge. Lay at least another across the U-bahn entrance,
maybe 2. You're going after the station and you don't want any
rude visitors.

This station has at least two more alternate entrances, and it's
more fun if you come in through the other entrances instead of
the main entrance. You could just go down and "Rambo" the station
by killing the three guys inside, but it's more fun if you find
an alley, and find the back entrance to the place. Try to silent
kill everybody inside, but don't worry if you don't succeed. Any
way, when you kill all three, get to the radio to get the secret
document there. When the cutscene's done, grab all the goodies at
the 2 boxes there.

Now it's time to play Alamo. Lay trip mines across MORE of the
entrances, esp. the main one, as many NKVD now will rush the
station. Seems the NKVD is also sending reinforcements to make
sure they get their hands on whatever they wanted. Your trip
mines above should be going off left and right. You can stay in
the station, or move out after leaving more presents.

If you choose to leave, go east through the hole in the wall, up
the tunnel, and emerge in a building. Mine the entrance, then
head upstairs, which is a perfect sniping spot. Kill machine
gunners, then any body else you spot. Kill any one trying to
cross the bridge, in fact. Head to the bridge (avoid any
tripmines you set earlier). Look for snipers in the distance, and
additional Russkies. Kill them all.

Now you need to head toward the square to kill some more NKVD.
Head toward your last waypoint, kill any NKVD in your way. Hide
under truck and such. If you see a truck, shoot its fuel tank cap
to make it go kaboom. Kill the rest of NKVD, at least 3 shooters
and a sniper.

When you get Objective Complete, head for the exfil point and the
mission ends when you arrive.


6.5.2     Prevent Enforcement

You start facing a tank and bunch of NKVD. Grab all the goodies,
and slide back and to left until you can see the fuel tank's cap.
Blow it up and take out all the soldiers (or at least most of
them). In the confusion of the explosion you can kill the rest.
Or you can try to take out all the soldiers first, watch for
those that hide to the right. Then sniper the fuel cap of the
tank. Boom.

Now you need to head for the sniper spot. Turn the next corner
and you'll see a German on second floor, and NKVD patrolling
below. Kill them all. Turn left, then right, and into the ruins
you go. You want to be in the building closer to the square in
order to get a clean shot. Run in through the window and climb
the stairs. Go prone. Look for the commander as he's beyond the
leftmost truck. Kill him or you lose. Then toss stick grenades at
the closest truck and the next closest. Boom!  The rest of NKVD
is coming after you though. Quickly lay a tripmine at the
staircase coming up, then turn left into a hole in the wall. Go
through another hole in the next wall, and you can exit the
building from that end to the back alley.

Sweep the square for hostiles. You want the papers the commander
left behind. You can get some goodies here.

Head back to your origin point, kill the last NKVD in your way or
avoid them, and you can go to Anhalter station.


6.5.3     Anhalter Station

Grab all the goodies nearby. Use a med-kit if you need one.

There is an NKVD Commando up front, but you can simply go in the
side entrance. When he turns, stay in the darkness and get
inside. I like to keep it quiet for this part. If the NKVD
commander don't see the guard outside he'll call for search
teams, and you don't want that quite yet, not while you can
spending time setting up surprises. On the other hand, the more
guards he sends out, the more you can kill.

Kill the guard patrolling there by keeping a bench between you
and him, and sneak out behind him and put a bullet in his head.
Watch out for the guy patrolling the platform above. If he's
there, wait until that guy's gone before ambushing the closer
guy.

Once you ambushed the closer guy, grab his body and drop it
behind the bus away from the platform in the distance. Go prone
as the platform patroller is coming. He'll go just past the first
bus. When he turns around, get out from under the bus and put a
bullet in his head. You don't need to hide this guy. Nobody else
will see him.

Climb the stairs to platform. Arm TNT, crouch. When ready, go to
locomotive, drop or throw TNT at locomotive, and backup quickly,
and go prone. Then shoot the TNT. Boom! The scientists aren't
going anywhere on this train. Now snipe the rest of the NKVD,
preferably from the tracks, as that place is nice and dark. Then
run for the front entrance and head upstairs, leaving behind a
trip mine every once in a while. Across the stairway is the best.

Get onto the roof and blow up the trucks by sniping the fuel
caps. Go back in and play hide-and-seek with the NKVD. Lead them
across your traps. Put down some more. Once you killed all of
them, you win!


6.6  NORDSIG HW PLANT

Infiltrate Nordsig Heavy Water Plant. We need to get Dr. Lohmann
out of there, or at least prevent him from falling into Soviet
hands. Destroy the plant while you're at it. Unfortunately,
Nordsig can only be approached by going through the U-Barn
system.


6.6.1     Via the U-barn

Situation: Get in via the u-barn.

Try to do the enemies as quiet as possible, or as noisily as
possible, it's up to you. Grab all goodies first.

Kill the sniper. Be warned that many will deploy grenades, and
those WILL kill you dead if they land close enough.

Clear the station, don't worry about the alarm, just means more
enemies to kill. Collect their ammo. Keep heading downstairs.

Get down to the tracks, and head toward the next waypoint. You
should see ONE enemy in the distance, kill him.

Keep doing, and the tracks split to left siding. German patrols
are in that little rest area. This is a great place to try your
grenade throwing. Toss one or two in there and cook multiple
enemies at once. Wait around as they are not sure where the
grenade is coming from. Throw another one when they group up. Arm
gun to defend if they do figure out where you are. Kill them all
and grab the goodies.

Continue down the track, maybe kill one guy to left, and you'll
arrive at Nordsig station. There's one wounded writhing on a bed
without a leg. Don't bother shooting him. (You can't hurt him)
Kill two guys talking in the middle. Collect the MG-42's with
plenty of ammo. Head upstairs. Follow the only path. There's one
door to the left. Covert kill the guy inside. Go through narrow
passage to next room. Chuck a grenade through and kill what's
left of the 3 guys here. Keep clearing the path until you see the
exit, and that's end of this level.


6.6.2     Approach to Nordsig

Situation: need to get through the streets around Nordsig so you
can reach the plant. Need to kill the NKVD commander to prevent
reinforcements.

Grab the goodies. Follow the waypoint and kill every guard you
see, pretty much. It's shoot and displace. Go through the
playground and work your way through the enemies, who will try to
surround you, but you should be able to pick them off one by one.

Soon you'll get to commander's HQ, and just put a bullet in his
head. Kill his guards if you can.

Work your way to the plant. There's a tank in your way, decide if
you want to kill it, or just run for it. If you want to kill it,
do the TNT throw and snipe routine.

Make your way to the exit.


6.6.3     Eliminate Guardpost

Situation: We need to clear the guardpost to get inside.

Grab the goodies. Work your way to the south gate, kill everybody
in your way.

Silent kill the sentry just inside the door. Then snipe the fuel
tank on the two trucks in the courtyard. That'll kill most of the
enemies, esp. the ones in the guardpost. Then shoot the sniper on
the upper right corner/stairs. He may come down though. And shoot
anybody else left.

Do NOT enter yet. There's an armored car that's got a nasty
machine gun to the left of the gate. Throw a TNT bundle close to
it and snipe it to destroy it. Kill the rest of the guards.

Go into the guardpost and grab all the ammo you want. There's a
TON of MG42 ammo to be had, and much more. You will need them.

When ready, follow waypoint into back entrance of the plant.


6.6.4     HW plant

Situation: The plant has three main buildings, and you'll need to
go back and forth a few times. This is a run-and-gun mission, not
too much sniping. Use grenades and SMG liberally.

NOTE: Too many enemies to list, and they move. Shoot first, ask
questions later.

You start in the south. Pick up goodies, and head for any GR
resistance goodies left for you. Kill sentries, of course. Keep
moving from cover to cover. Lots of enemies will show, about half
dozen per building at least.

Make it to the north end of warehouse. Doesn't matter upper or
lower floor, just get to north end. Head out to courtyard. Try
NOT to blow up the truck in the courtyard as it has some goodies
next to it. If you do blow it up you may die too from the chain
reaction. Beware. Also shoot any snipers on the next building
over. Watch for enemies coming up behind you. Consider laying
some tripmines to guard your back. Just leave one entrance NOT
trapped.

Cross the courtyard into building 2. Again, 2-story building.
Clear it. Set time bomb with at least 5 minute fuse on either of
the doors. You can use TNT as well, but wait until the timebomb
go off. Plant the bomb (I prefer the western door), and then find
a good spot to wait and wait. When it goes BOOM! Defend yourself
against more Germans. Then blow up the eastern door as well (I
use TNT for that).

Go through, and you're in building 3. Go inside, kill all the
guards you can see, then go inside the first door to your right
to Dr. Lohmann, and get a cutscene.

Cutscene: Well, Dr. Lohmann, you must come with me.

Head to the huge tanks of heavy water.

Cutscene: You turn on the drainage valve. Russkies will get
nothing.

Back to building 2, kill more guards who has appeared. You're
looking for the officer who has the combo to the safe. Kill his 2
guards, and approach him.

Cutscene: You persuaded the officer to hand over the safe combo,
and "thanked" him for his contribution.

Head back to building 1, kill more guards, then kill the guards
at the safe. Approach the safe.

Cutscene: you got the safe open, and got the stuff inside.

Head across the building to the radio room.

Cutscene: GR/OSS team is pinned outside and needs help.

Back to building 2, but this time head for the LONG staircase in
the far corner that goes all the way to the roof, and this
mission ends.


6.6.5     Assist OSS Team

Situation: You're on the roof of the plant, and you need to help
the GR team break into the plant despite everything the Russians
and Germans are throwing.

Pick up the goodies and go prone, move forward. Kill bad guys at
the 2 entrances first, then kill the tank to your left that will
appear in a bit. Either toss a TNT bundle down there ASAP and
wait for it, or snipe the fuel drum cap.

Keep killing any Russians that you can see. They probably have
their back toward you, unless they are shooting AT you. Keep
killing Russians, and when the tank appears, put a bullet in its
rear aux tank cap. That's the most important thing. Kill
Russians, and even a few snipers that you may spot.

Keep killing Russkies until you get Objective Complete message.

Now it's time to come back down. Go down via the stairs and get
out the way you came in. It's time to boogie.


6.6.6     Exfiltrate Nordsig

Pick up goodies, through the park, keep to the shadows. Go around
the block and into the alley to meet your contact.

Cutscene: you get the M91, among other goodies. However, there
are 3 "elite snipers" out and about. Take them out if you want,
else just run for it.

If you want to take them on, follow the waypoints on the map. Be
warned, the moon is bright and visibility is excellent for them,
but not quite for you. There are also myriad of other NKVD units
about hunting for you.

When ready, head for the exit, avoid/kill any patrols, and when
you reach the U-Barn station the mission ends.


6.7  RECOVER V2 TECH

Russians intercepted a German shipment of V2 rockets. We can't
let them keep it. They are holed up at the Schloss, and we have
no way of getting through without doing a few things first. We
must cut their comm so they can't call for help; we must take out
all nearby ammo dumps so nobody can reinforce them; we must take
out nearby fuel depot at train station; and finally, we'll
assault the Schloss.


6.7.1     Cut Communications

Situation: the local Soviet HQ is trying to call for help. They
are trying to send motorcycle couriers. Intercept all three. If
even one make it through we are sunk.

Look at the map, and you'll see you need to go "south" to
intercept the first run. Best way to get one is with a tripmine,
but a burst of machinegun will work just as well.

Grab goodies, and head south, follow the street. Kill anyone in
your way. When you get to the path, lay tripmine across the road
where the motorcycle must cross. Move west 25 meters, and repeat.
Now just find a place nearby relatively secure, and wait. At
3:05, you get warning that first motorcycle has left. Arm SMG or
MG and wait by the road. When it comes by, hose it.

Keep moving west and plant another trip mine in path of
motorcycle 2, and then move NORTH to intercept #3.

And throw some grenades into the enemy HQ as well. That'll kill
the commander and net you a secondary objective.

Head for exfil point when you've dealt with all three
motorcycles.


6.7.2     Destroy the Ammo Dumps

Situation: We need to destroy all the nearby ammo dumps to make
the assault easier.

Pick up goodies. Take out the sniper in the building in front,
then another around the corner.  NKVD troopers will assault, so
defend, defend, defend. Lay trip mines if you want to.

When the assault stops coming, you can follow the waypoint to the
first ammo dump. Kill all guards. Only a few remain. Plant
timebomb where specified.

Repeat at the 2nd ammo dump. Take as much supplies as possible.

Go to exfil point.


6.7.3     Disable Katyushas

Pick up the goodies. Head for the central "circle", and go up to
the GR commander.

Cutscene: GR commander ask you to help them kill all the NKVD,
rescue the pilot, and take out all the Katyusha rocket launchers
(two of them, one E and one W.

Get up that pile and snipe at every NKVD you see there. GR will
assist but you need to do the brunt of the killing.

When you get goal complete, go forward and frisk all the bodies.
Turn to the pilot's location. Kill NKVD patrols there. Watch out
for a sniper.

Follow pointer to the pilot. Area is probably clear, but make
sure. Bring him back to the GR commander.

Head toward first Katyusha, and watch for snipers on rooftops,
take them out from as far as possible. Once you get to the
square, take out all defenders, but watch for additional snipers
on rooftops you can't see. Either use timebomb or TNT/snipe to
get rid of the two launchers there.

Repeat at the other site, kill all in your way, and watch for
snipers, blah blah blah.

When that's done, head for the train yard as per pointer.


6.7.4     Holzmarkt Train Yard

This one is basically blow away every NKVD you can see, as well
as blow up the fuel tanks.

Pick up the goodies and start crawling. You need to reach the
first warehouse. However, watch out. There's an armored car there
in ambush position. Check every corner, remember! Throw TNT and
snipe it to get rid of that armored car.

Kill every guard you can see. Then get inside, and try to climb
the pipes so you can get up into the rafters. Shoot everybody
until things quiet down. Drop a time bomb at the indicated
location.

Go out and kill the NKVD in the "between" courtyard.

Kill all the NKVD in the 2nd warehouse as well. This will likely
be a run-and-gun, so there's no point in giving details. Once you
take a shot, displace, ambush. Enough said. Stay up in the
rafters is probably much more fun than run and gun down at ground
level.

When complete, head for the exit.


6.7.5     The Schloss

This is one TOUGH mission, better save when I tell you to!

Pick up the goodies (yes, always), arm pistol. There are 3
sentries, two on your starting block, one on the block way to
west. Get rid of them with your pistol only. Save.

Optional: plant some tripmines and TNT on the "main road" in
periodic intervals so you can help get the tank and any other
NKVD attacking later.

Go to western bridge and meet the GR leader there. You'll get the
cutscene. The Russians are going to make a break for it. So get
forward. When ready, shoot only Russians, NOT the trucks! (You
can shoot the leading half-track, no problem)

You'll get a cutscene, then the pillbox's machine gun opens up.
Snipe the shooter, and anyone else shooting at you. Save

Run for the Schloss, get inside, and shoot all comers. Get
upstairs, shoot all defenders until mission complete, you've
captured the Schloss. Head for the far side of the Schloss. Hole
in the wall gives you vantage point over the entire front. Save.

NKVD starts attacking in a few minutes. Start sniping or hose
them long range with SMG/MG. Some will make for the western
bridge, while other will try to get through Eastern bridge. The
more you kill before they reach either bridge, the better. And
try to hit the tank's fuel drum cap or hit the TNT you left
behind before it crosses the river. Remember, enemy attack will
run through both bridges. Beware!

When you get "another 4-man team is rushing now!", save. A truck
from move from left to right on the other side of the river. Use
machinegun and hose the truck. It must go BOOM. Then see if you
can get lucky and kill the commandos who'll rush both bridges.
Kill all of them, make sure they don't reach your building, as
they can kill your GR friends quite easily. Save.

Cutscene. Another NKVD unit has broken through the rear! Quickly
turn back and look down to first floor, and snipe all NKVD.

Once you got them all, come back down, walk out the door they
came in. That's the end of this mission.


6.8  ESCAPE FROM BERLIN

Berlin will fall soon, and most major transport centers are
already in Soviet hands. Best way to extract is to steal a plane
at Templehof Airport. You will need a pilot.


6.8.1     Extract the pilot

Cutscene: As you arrive, you find your pilot was lead away by
NKVD. You get off to set an ambush for the convoy.

Grab all goodies. Get to the convoy route, and setup 2 trip mines
across the road. It's for the half-track leader. Then get
"behind" the convoy's route and get ready. Boom! The convoy
stops. Shoot all the defenders, and walk up to the truck. Voila,
you saved the pilot.

Cutscene: Unfortunately, the pilot wants his brother rescued as
well.

You head for the observatory. Use long-range shots, take out as
many NKVD as possible from long-range. Watch for grenade
throwers, as those can be deadly in closer range. When ready,
head for the other side of the observatory, head upstairs, and
you'll find Thomas. Except, he won't come along! *sigh*

Head back to the pilot (he's hiding nearby, really), who somehow
accepts your story at your word. You have to lead him to safety.
So, take him cover to cover, kill any NKVD in your way, including
snipers. And head for the exit. (Hit "e" to switch between
"follow" and "stay" modes). You have to get close for him to hear
the command.

Make it to the exit.


6.8.2     Journey to Tempelhof

Situation: Your two truck convoy makes a run for the airport...
and the first truck gets blown to pieces by a Soviet tank. Your
truck avoids the tanks and stops... Area is surrounded, and NKVD
is closing in. You must defend the truck from NKVD commandos (at
least a dozen!), as well as take out the two tanks in the area
and their NKVD escorts, with NO panzershrek!

Grab all goodies, and quickly plant at least two trip mines at
each of the streets leading to the truck. The two toward the
tanks deserve more attention. If you hear detonation or a warning
about "approaching NKVD", RUN over and check it, and kill NKVD if
you see any. Quickly frisk their body for ammo and perhaps, more
trip mines. Plant additional trip mines if available. You have to
kill all attacking NKVD commandos. Keep killing attackers until
"goal complete". You have to survive for a while. So be careful.

Once that's done, you have to go kill the two tanks, and the rest
of NKVD. Those tanks patrol randomly in their sector, but if they
see you they'll come after you. Killing tanks should be done by
tossing TNT into the road, then hide and wait until the tank
comes along, and shoot the TNT. Kill any remaining NKVD as well.
Enough said. So go do it. Make sure you deal with all the other
NKVD as well.

When all clear, head back to the truck and you're on your way to
the airport.


6.8.3     Tempelhof Airport

Situation: Eliminate the sentries in the main hangar, sneak over
to plant bomb at the fuel depot (optional), assault the tower,
come back down, kill folks in the radar van, kill enemies coming
in via trucks, defend the plane as it taxis.

Go prone and arm pistol. There is one guard in the "machine room"
between the two hangars, and you need to kill him silently. Leave
the body, as nobody will see it, stay quiet though. Head to the
next hangar, kill guard walking in, and a third guard. That's all
the sentries. Save now

Now go to the farthest hangar east, and outside that door,
crawling all the way. Stay in cover, move up to radar van, and
behind it to fuel depot. Try to silent kill everybody. Drop time
bomb for 5 minute fuse there (more like 7, but that's depending
on how fast you can get back to the control tower). Sneak back
the way you came.

Go back to tower, assault it, kill officer on top. Reinforcements
should be pouring in, kill them all. Grenades are good. Head
downstairs, and hopefully your fuel depot bomb will detonate
soon.

Now approach the AA radar van, and kill both occupants. If you
see truck approaching, blow up the truck and toss grenades at the
truck as well.

Now your plane comes out of the hangar. Get out of its way! (You
don't want to be ran over by it!)  Then RUN after it!

Cutscene:  more than a few trucks of NKVD rush you, while you
just keep shooting until the pilot tell you to come on, and you
manage to jump in the door just as the plane takes off.

NOTE: Now that you finished the main campaign, you get a new
"secret mission" in the mission selection screen.


6.9  SECRET MISSION

The Safehouse is a "secret mission" only accessible after you've
completed the main campaign.


6.9.1     The safehouse

Situation: You are in the middle of a battle between German and
Soviet forces. You need to head north to your contact.

Guards everywhere. One goes around the block, while others have
their own patrol routes. Some overlap, but not others. If you are
good, you can sneak through without killing anyone. Else. just
kill Soviets.

Get into the hotel and meet your contact.

Cutscene: Your contact radios local HQ, who then informs you that
NKVD has compromised your position, and you need to make a run
for it. However, your contact needs 5 minutes to destroy the
cipher machine. With 5 trip mines, help defend the place to give
him the time.

Grab the tripmines and run downstairs to plant one mine across
main entrance, one across the restaurant entrance (trust me!),
another just before the staircase, then the rest on the
staircases. Then head to the roof. NKVD is approaching from the
north, and the more you can kill outside, the less you have to
worry about inside. Once it looks like there's no more, head down
and head for opposite end of the corridor, then turn and face the
stairs, but right at the door. Crouch and be ready. If enemy toss
a grenade you have to be able to duck inside the room.

Wait for the mines to go off. If enemy reach your level alive,
hose them with MG or hit them with sniper fire. Grenades would
work too, but I doubt you have many. Once you get them all, this
objective's done. At least 8 NKVD commandos I think, including 2
officers. Collect all the ammo and stuff left by the NKVD donors.
You'll need them.

Go back to your contact, and lead him downstairs. You want to
turn RIGHT at the main door. It's a run-and-gun scenario, no time
to get fancy as there's just too many of them. If they get close
enough they'll grenade you and your buddy is vulnerable to
grenades. So shoot a few, run a block. Shoot a few, run a block.
Watch for snipers too. Reach the safehouse and run inside.
Mission complete!


7    Miscellaneous


7.1   CHEAT CODES

Only three cheat codes are known. They should also work for the
Xbox version.

Create a profile with the following name to activate the special
power:

Panzer         explosive bullets (every shot acts like a
panzershrek hit)

Stealth        silent bullets (every shot is silent, no enemy can
hear it)

Ratbomb   rats will explode when hit

NOTE: Your score will be ZERO if you activate any of these
cheats.


7.2  OTHER CHEATS

There is a trainer available that will give you infinite ammo,
infinite items, infinite life, and so on. It won't improve your
accuracy, nor can it really save you from a grenade hit or a tank
hit, but it will help you survive bullet hits and such. Search
for it.


7.3  MULTIPLAYER

No comment, as I haven't tried it.


7.4  RELATED WEBSITES AND FANSITES

The only fan site I can find is

http://oneshotkill.hostmatrix.org/phpnuke/index.php

Where you can find "intro skipper", among other useful utilities.

--THE END--