-<>--<>--<>--<>--<>--<>--<>--<>--<>--<>--<>--<>--<>--<>--<>--<>--<>-
_____
(_____) _
_ ___ _ _ ____ ____ ____ _ _ | |_ ___
| |/ _ \| | | |/ ___) _ \ / _ ) | | | | _)/ _ \
___| | |_| | |_| | | | | | ( (/ /| |_| | | |_| |_| |
(____/ \___/ \____|_| |_| |_|\____)\__ | \___)___/
(____/
_______ __ __ __ __ __ _______
/ || | | | | | | | | | / |
| (----`| | | | | | | | | | | (----`
\ \ | | | | | | | | | | \ \
.----) | | | | `----.| | | `--' | .----) |
|_______/ |__| |_______||__| \______/ |_______/
FAQ/Walkthrough
>>==<<==>>==<<==>>==<<==>>==<<==>>==<<==>>==<<==>>==<<==>>==<<==>>==
For Nintendo NES
Version Final
By Chris Zawada
User: antseezee
E-mail: chris@z-wad.com
Website: www.z-wad.com
Created: 06/20/04
Last Update: 03/10/11
Copyright 2011 Chris Zawada
-<>--<>--<>--<>--<>--<>--<>--<>--<>--<>--<>--<>--<>--<>--<>--<>--<>-
Author's Note
----------------------------
Action games continue to be a thriving success in the video game industry.
Back during the NES era, they were practically one of the premiere genres that
every gamer looked forward to getting their hands on. Skills which required
quick reflexes, precision timing, and button smashing are often reminiscent of
these sorts of games. Journey to Silius is yet another action platformer which
combines these key elements which an employing storyline and amazing
soundtrack. Along the way, you'll acquire upgraded weapons, destroy people
responsible for your father's death, and ultimately acquire revenge at the
same time. Blast away for the sadness in your heart, or be swept away by
cybernetic terrorists!
Contributing/Feedback
----------------------------
If you have any contributions, feedback, or strategies you'd like to have
added to the guide, contact me via e-mail or on GameFAQs. I'll be more than
content to add your segment of information, and will also provide credit. If
you have any questions you'd like added to the Common Questions section, ask.
I simply don't have the time to sit around thinking of questions. Provide me
with what you want to know!
Updates
----------------------------
=05/04/05= vFinal
Final update.
=05/04/05= v Final
Final update for this guide.
=06/23/04= v1.0
Finished the FAQ. Well worth the wait.
=06/20/04= v1.0
Started the FAQ. Expecting to finish this one within the week.
============================
- Table of Contents -
============================
1) Introduction
2) Game Basics
> Controls
> Weapons
> Other
3) Walkthrough
> Stage and Boss Strategies
4) Codes
5) Common Questions
6) Copyright/Distribution/Reproduction Guidelines
7) Proper Credits
-<>--<>--<>--<>--<>--<>--<>--<>--<>--<>--<>--<>--<>--<>--<>--<>--<>-
============================
- 1) Introduction -
============================
Action platformers are always something the NES and SNES were popular for.
Shooting action games further enhanced the genre with breathtaking action, and
ranged projectiles to worry about. Games such as Contra and S.C.A.T. are
perfect examples of titles where it's all about blasting away your enemies.
Journey to Silius is yet another shooting action game that pits you in an
involving storyline along with a great musical soundtrack, and different
weapons to use. Pitting a futuristic theme, you'll face many cybernetic and
robotic threats that have to be dealt with swiftly. Combine these elements
with varied environments full of traps and moving platforms, then you've
really got a sticky problem. However, Journey to Silius's music was composed
in an ingenius manner that almost grips the player by their shirt to continue
on playing. It has some of the best music you will ever hear on the NES.
The storyline is actually somewhat realistic for the setting of the game. Your
father is a world-praised scientist that expands the technology involving
Space Colonization and Development. Millions of lives are saved as humans can
now expand to underpopulated locations, due to the help of a brilliant
scientist. You play the role of Jay McCray, the son of the exceptional
scientist. Suddenly, one day, an explosion rocks the colony where his father
is living, and kills him. While Jay was searching around his father's room, he
found a floppy disk that said the terrorists were trying to stop the colony's
development. Now the storyline has turned into a mission of vengeance, as Jay
goes out to single-handedly destroy the terrorists responsible for his
father's death, and to continue the project he could not finish.
Here's a brief excerpt from the instruction manual (credit to Sunsoft):
The time is the year 0373 in the new space age calendar. The earth's
population is exploding so rapidly that people are seeking exodus to an outer
space paradise. People everywhere are eager to develop space colonies and
emigrate to them. Jay McCray is no exception. He is preparing for his journey
to the new space colony #428 in the Silius Solar System. He decided to move to
the colony because his father, an astute scientist, was instrumental in the
space colony development. Jay had always been proud of his father and wanted
to be like him, even more so now, because his father was appointed leader of
the SSS colony development.
Jay's dream is to be on a space colony development team. Unfortunately, his
dream will not come true. A devastating explosion rocked the SSS colony and
destroyed everything, including all project data and the research team. Any
further development of the colony would be impossible. Because Jay's father
was killed in the explosion, Jay would never know what really happened. He is
determined to take over for his father, but without his father's records,
research is at a standstill.
While searching his father's room, Jay finds a floppy disk. When he puts it in
the computer, he realizes, it contains a complete plan of the SSS colony
development. The disk also includes a letter from his father which
reads, "Terrorists are plotting to destroy the colony development. If anything
happens to me, you must complete the project."
"Father knew this would happen," Jay said to himself, "but, now that I have
his plans, I can finish his work." As Jay worked on the project, he realized
the terrorists were still out there and even more determined to destroy the
SSS colony plan. Jay then vows, "I have no choice but to fight the terrorists
to defend the colony development and to avenge my father's death."
----------------------------
_____________________
##### GAME INFO #####
//////////|\\\\\\\\\\
Players: 1
Developer: Sunsoft
Released: 1991
Rarity: uncommon
Special Features: n/a
ESRB: n/a
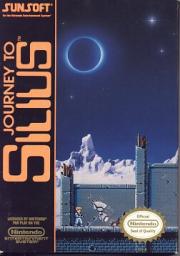
Cover Art on box:
- Shows one of the stages with Jay, a robot, and a desolate background
-<>--<>--<>--<>--<>--<>--<>--<>--<>--<>--<>--<>--<>--<>--<>--<>--<>-
============================
- 2) Game Basics -
============================
The NES controller is a very simplistic and straight-forward match when it
comes to action platform games. The simple two-button layout allows most
characters to jump, sprint, and fire with ease. Unlike modern games which have
multiple functions for shooting, Journey to Silius is easy enough for even a
young child to master.
______________
/Game Controls/
-=-=-=-=-=-=-=-=-=-=-=-=-=-=
A - jumps
B - shoots
START - brings up weapons selection screen
SELECT - pauses game, alternates between selection of weapons
CONTROL PAD - moves Jay in designated direction
- Since this is a simple action platformer, there's not much to expect in an
intricate fashion. Jay can be moved around using the control pad. Pressing
down will have Jay prone on the ground, which allows for low shots on your
opponents. Because of the game's horizontal design, you may only move left or
right with the main character. You have unlimited ammo with your default
blaster, but are limited with weapon energy (a bar in the upper left portion
of the screen).
________
/Weapons/
-=-=-=-=-=-=-=-=-=-=-=-=-=-=
Unlike other certain shooters, sometimes the weapons can be fairly limited.
This ends up bringing down the overall fun the player will receive blasting
away different enemies with unique and special weapons. Journey to Silius has
a set number of 6 different weapons that you may use. Each weapon has a
special power or shot radius which makes it different when compared to
another. Most special weapons can only be used sparingly because of a weapon
energy bar in the upper left hand corner of the screen.
_______________
|>#-> HAND GUN \
================
^ Acquired: Stage 1
^ Usefulness: ***
- The Hand Gun is your basic weapon which will be used exclusively throughout
the game. Unlike other special weapons which use energy, your hand gun does
not use any weapon energy at all. This basically means you have infinite ammo
when using the hand gun, and are not restricted on how many shots to fire. The
weapon is semi-automatic, so you'll have to keep tapping the firing button in
order to send out rapid fire.
_______________
|>#-> SHOT GUN \
================
^ Acquired: Stage 1
^ Usefulness: **
- The Shot Gun is more of a specialist weapon. When fired, it sends out three
shots, one that goes up diagonally, one that goes straight, and one that goes
down diagonally. In simpler terms, the Shot Gun is designed for hitting
targets in obtuse or awkward positions that cannot normally be reached. You'll
often find robotic mounted units in elevated positions that are hard to reach.
The Shot Gun let's you keep yourself secure, and lay down these angled shots
to hit targets. Unfortunately, you do not get a boost in power per shot, and
it does use up energy in the weapons bar. You will also start with this weapon.
__________________
|>#-> MACHINE GUN \
===================
^ Acquired: Stage 1
^ Usefulness: ****
- The Machine Gun is one of the better weapons you will use throughout the
game. Its primary feature is that it has rapid fire, allowing you to send
several bullets right in a row without any remorse. This is perfect since you
can easily kill bosses and enemies by holding down the firing button, and
hitting their exposed positions. The only flaw is that the weapon uses up A
LOT of energy in a short amount of time. You can get this weapon near the end
of the first stage.
_____________________
|>#-> HOMING MISSILE \
======================
^ Acquired: Stage 2
^ Usefulness: **
- The Homing Missile launcher is basically what it stands for. It allows you
to send out up to three rockets at a time which home in on an enemy's weakness
point. Unfortunately, these babies eat up a ton of energy, despite having an
increase attack power rating upon hitting targets. These are best used on
enemy bosses, or tougher opponents. You will receive this weapon by defeating
a mini-boss on the second stage.
__________________
|>#-> LASER RIFLE \
===================
^ Acquired: Stage 3
^ Usefulness: ***
- The Laser Rifle sends out blue streaks of lasers that do extended damage.
Basically, when one ray is launched, it will go through its target, but also
lay down extended damage because the lasers are long, stretched-out attacks.
Because of this, you may also penetrate certain structures, allowing you to
hit opponents through walls. Each shot does use a hefty amount of energy in
the weapons bar, but these are still very useful. Again, this is acquired
during Stage 3.
_______________________
|>#-> GRENADE LAUNCHER \
========================
^ Acquired: Stage 4
^ Usefulness: *****
- The Grenade Launcher is one of the best guns in the game, however, you'll
receive it near the end as well. This weapon let's you launch a grenade out at
targets, which then explodes to cause massive, heightened damage. While it
does use a decent amount of energy per shot, the results are worth it based on
the damage sent to your opponents.
______
/Other/
-=-=-=-=-=-=-=-=-=-=-=-=-=-=
Along the course of Journey to Silius, there are some other key elements,
items, and principles you will have to get use to. This brief section will
describe each of the gameplay elements that you should get familiar with.
- LIFE ENERGY METER - in the upper left hand corner, you will see a pink
meter. This designates how much life Jay has left.
If it ever gets damaged or lowers, you may be able
to find red energy capsules off of defeated
opponents, which will increase the life bar.
- WEAPON ENERGY METER - in the upper left hand corner, you will see a blue
meter. This designates how much weapon energy Jay
has left. It's a universal setting, meaning all
weapons draw from the same energy stash. Blue energy
capsules will replenish a depleted bar.
- WEAPON BUBBLES - as you defeat bosses during the game, some of them will
drop pink bubbles with a letter inside. These are your
essential weapons which can be gained throughout the
game. Pick up the bubble to find an upgrade for a new
weapon.
-<>--<>--<>--<>--<>--<>--<>--<>--<>--<>--<>--<>--<>--<>--<>--<>--<>-
============================
- 3) Walkthrough -
============================
Every platforming game can sometimes get tough around or on certain levels.
When this occurs, you'll often be frustrated if you cannot make it past a
certain group of enemies, or a protruding obstacle. This is where walkthroughs
excel; they allow you to figure out alternate ways of overcoming your
opponents. This section will describe some of the challenges taken on during
each stage, along with boss strategies.
________
/Stage 1/
-=-=-=-=-=-=-=-=-=-=-=-=-=-=
Young Jay will start off in a deserted space colony, as he approaches Silius.
To start off, you'll encounter a varied amount of enemies on this level. Your
most prime threat is a robot that hobbles at certain intervals. It can easily
be taken down by a few shots. You'll also have to deal with artillery shells
being launched from the background of the screen. Mines on the ground can be
avoided by leaping over them, or proning and firing. Finally, there will be
overhead screws that fly over, and release shots much like your Shot Gun.
- Start off by going right and taking down the basic threats. Leap across the
gaps you'll see during the level. There will be ground-mounted lasers that pop
up every three seconds. Jump in the air, fire a few shots, and wait for it to
fire its laser. You'll want to repeat this process to take them down. Watch
for a rocket-mounted launcher about a quarter of the way through the level.
When you reach the certain area with two mines next to each, hop in the middle
of both, destroy the one, jump to avoid a laser, destroy the other, and take
out the laser-shooter. You'll get use to certain traps that are set on the
levels. You'll know you've reached the mini-boss when you see a giant photon
cannon launching blue fireballs at you. To destroy this ferocious beast, get
about a half-screen distance between you and him. Stand and keep firing with
your hand gun, then jump over the first fireball, and prone under the second.
Keep firing during this process. Sometimes his second fireball will hit you
when you prone if you're too close to him. After the machine is defeated, grab
the Machine Gun upgrade, and prepare for Boss #1.
_________
(( BOSS #1 )) "Helicopter & Mini Robots"
- This boss can be fairly simple. Start off by switching to your Machine Gun
upgrade you just received. Run about 2/3 of the way across the screen so that
you're slightly to the left of the dropship door on the helicopter. A red
alien creature will hobble down from the copter above. If performed correctly,
he should land right next to you. Keep firing your machine gun, and two more
aliens will pop out of the chopper. The aliens will usually hop when you fire
your weapon, so time your shots when they land. The chopper will then come
down to ground level, and start firing off 3 shots at various heights (high,
medium, and low). Try to time your jumps so the highest shot is fired, and use
the rest of your Machine Gun ammo on the flashing red-purple dot. The chopper
will go down after about 20 shots.
________
/Stage 2/
-=-=-=-=-=-=-=-=-=-=-=-=-=-=
Young Jay will start off in an underground labyrinth, which was probably part
of the terrorists' network. Inside you'll find various chemical barrels,
industrial machines, and threatening security systems. Some key enemies
includes a slow moving robot which fires after so many seconds on screen. The
typical screw-shotgunner, along with a rotary machine gun that sprints up,
fires, then retreats to the back lines. There's also a screw on the ground
that pops up when you get close. Finally, there will be mounted circular traps
that shoot bullets in clockwise directions.
- Start off by going right and taking down typical threats until you see a pit
on the right. Jump down, and watch for enemies along the edges. You might have
to use your Shot Gun to take out a troublesome turret. Once you're at the
bottom, watch for two laser mounters. Continue to the right. You'll run into
the plasma cannon from the first stage. Use the same tactics from before, and
board the elevator. It might be best to use the Machine Gun on him. You'll
face some usual enemies then reach another elevator. Board it. This next part
can be fairly tricky. I usually sprint right through shooting my pistol. There
will be troublesome bombardments from above, along with traps to avoid. Sprint
right through, but keep firing to take out anything straight ahead. Once you
pass the two lasers in a pit, pull out your Machine Gun, and prepare to fight
the mini-boss. The enemy is basically a large armored cybernetic robot that
walks straight towards you. Use your Machine Gun, and keep jumping up, and
firing at the exposed lacking head. He will die quickly if you use the MG.
Pick up the Homing Missile upgrade afterwards.
_________
(( BOSS #2 )) "War Vehicle Robot"
- This boss is fairly tough if you don't have any energy left to use homing
missiles. The problem is that it has a retractable arm that extends out when
you get close. It also launches pink bubbles from its mouth that usually pelt
your position at 3 different locations. Finally, if it touches you, you also
take damage. Because of this, it moves closer and draws away to keep extending
its range of attack. Aim for the pink-purple bubble flashing around its
stomach line. Keep pelting it, but try to run forward to avoid the far bubbles
that will come out about every 5-7 seconds. Really you should try to save your
energy for this battle, and use the homing missiles.
________
/Stage 3/
-=-=-=-=-=-=-=-=-=-=-=-=-=-=
Young Jay will start off in the Terrorists' Headquarters. Obviously this
freshens up the vengeance theme a bit, but we're still far off from completing
the game. You'll have a new variety of enemies to deal with. Your first threat
is a walking robot that's fairly tall. He'll fire off multiple shots after
you've been on screen for so many seconds. A jetpack alien will fly slowly
across the screen. You'll also have mines that come off of the side portions
of the screen very fast. They can be destroyed with one shot, but try to keep
firing off the edges on this stage.
- Start off by going right and taking out the basic threats. Leap over the pit
holes to avoid death. Watch for the mounted bubbles on the ceiling and floors.
They'll launch bullets in diagonal patterns in alternate sequences. Go up the
elevator, and take out the wall-crawling spider on the left. Avoid the red
forks along the level. These pesky items will quickly drop down to stab you
when you get close. Get close, move back, then sprint across as they go back
up. There are also alternating blue laser beams. These can be avoided by
waiting for them to disappear, and quickly leaping through. Keep on going
right, avoiding the tricky and tight rooms. Go down the elevator, and start to
move left. When you drop down the pits, watch for the spiders along the walls.
These guys will prove to be real pains in the arse. Continue onward to the
right, and leap down the pit. Move right to continue onward. When you reach an
area with a blue laser and a tripper, use your homing missile to take out the
tripper, then jump through. Hop onto the next elevator in the gray area. Once
you reach a series of lasers in a row, watch for flying jetpack robots. When
you reach the area ahead with the blue walking robot, pull out your Homing
Missiles, and keep firing them until he dies. Pick up the Laser powerup.
_________
(( BOSS #3 )) "Troops of Cannons"
- This boss takes a decent amount of concentration to get past. Start off by
quickly sprinting to the right and proning right where the step is to the
higher ground. You are untouchable in this spot. The only problem is that
you'll have to figure out a way to hit the center bubble. Move Jay back
slightly from this upper step, and prone there. Wait for the upper right
diagonal laser to fire, then wait for the lowest cannon to fire. When this
happens, stand up, and wait for the succession of cannons to fire again. Leap
up when the low one fires, and shoot at the bubble (with your newly found
laser upgrade). Time yourself another four seconds, get up, and fire again.
The idea is to time your jump to fire right when the diagonal laser has gone
by, and the lowest cannon can be leaped over.
________
/Stage 4/
-=-=-=-=-=-=-=-=-=-=-=-=-=-=
Young Jay will start off in the Terrorists' Spaceship. Apparently infiltration
has never been so easy. This level is very threatening because of the speed of
your opponents. You'll have to deal with floor sprinklers, along with flying
blue robots off the side of the screen. The blue walking androids are sort of
like the red mummies from the previous level.
- Start off by going right, and then down the elevator. Go right again, but
watch out for the crushing pilons. There will also be red static crushers that
swoop up and down. You can try leaping over them, or underneath them if you
have enough distance. There will also be blue sweeping robots to watch out
for. They launch out shotgun patterns. Continue down the gap on the left, and
watch out for the ceiling metal droppers above. Use your machine gun on the
blue swoopers for easy displacement. You'll eventually reach some pits on the
left with metal blocks. Quickly leap onto the blocks and over, otherwise
you'll plummet because the blocks fall off after so much weight. Blue flyers
will try to take you down as you leap over the pits. On the pit with four
blocks, fire as you leap over, otherwise two blue flyers will take you out. Go
up the elevator.
Continue onward as usual, leaping down the right pit. Keep moving to your
right, and you'll eventually hit a reddish area. There will be a few more
sweepers and default enemies which can be destroyed a tad easier thanks to the
Laser. When you reach the far end of the level, you'll be forced to face a
blue flying master robot. This guy basically flies towards you, and will
launch two cannon pellets. I find it best to use the Laser, and keep leaping
up to shoot his head. You will take damage as it's extremely hard to defeat
him before he closes in on you. Once you destroy his first form, watch out for
his flying head. Use your normal Hand Gun to destroy it (it will shoot shotgun
pellets every once in awhile). Pick up the Grenade Launcher upgrade.
_________
(( BOSS #4 )) "Mammoth Cannon"
- This boss is actually one of the easier ones throughout the game. You'll be
positioned on a small platform with a gigantic alien blaster. A blue launcher
will charge up and then send out a photon beam. Jump over the beam, use the
newly-found grenade launcher, and fire it while in mid air. It'll actually
have a delayed shot and hit the exposed core of the boss when he opens up. If
you're out of energy, then you're going to have a tough time defeating him. He
usually opens the bubble up after launching a photon at you.
________
/Stage 5/
-=-=-=-=-=-=-=-=-=-=-=-=-=-=
Young Jay will start off in the Terrorists' Spaceship Factory. However, this
level is MUCH different than the other ones you have encountered. For
starters, the screen will scroll horizontally from the left to right, and you
MUST move Jay away from the moving borders. If he comes within contact of
them, he will be pushed along, so be careful. So not only is this a race for
time, but you have to deal with environmental hazards as well. There are no
enemies, but the environment will be your toughest opponent.
- Start off by going right. Watch out for the crates that drop down from
above. There will be some lava sprinklers ahead that can only be triggered by
getting close to them. Be weary though as each lava pit pummels down in
specific intervals. You have to time them in your mind, and jump right when
the last bit comes down. Otherwise, you'll take lots of damage, and the screen
will catch up with you. When you reach the moving platforms section, try to
get as close to the right of the screen as possible. When the one platform is
moving a large crate to the right, jump on that crate, then jump to reach the
conveyor belt above. Jump past the gap to reach solid ground again. That
section alone might take some players LOTS of practice get past. As you
continue to the right, make your way past the metal stompers. The next part is
very tricky. Large brown crates will fall from above. You have to watch for
the falling crates, while paying attention to the direction of each conveyor
belt. When you reach solid ground again, watch for the two tricky ceiling
squashers. Quickly leap past them onto solid ground ahead. You'll know you've
reached the end of the map when you make it to the last long conveyor belt.
_________
(( BOSS #5 )) "Giant Exodus Spaceship"
- This boss is easy if you can manage to dodge the rotating turrets at both
the front and back ends. To start off, immediately equip your grenade
launcher, and go to the far left. Start jumping and shooting at the head
console of the ship. It should get destroyed after about 8-10 rockets.
Meanwhile, you'll have to dodge a rotating eye turret. After the front is
destroyed, start walking under the ship. Avoid the blue boosters that come out
(each set will go off after a bit), and watch for the rotating back turret.
Repeat the process by destroying the back console using your Grenade Launcher,
and voila, you've taken down a massive ship. Make sure you don't get crushed
when the ship lowers during the entire process.
_________
(( BOSS #6 )) "Android"
- This is the final battle, and the person responsible for your father's
death. To start off, the Android is a very simple boss, however, you're
heavily worn out from the Spaceship battle, and have probably expended all of
your ammunition on it. Thus, this battle is mainly designed for your Hand Gun.
To start off, you have to leap and shoot him in the head to cause damage.
He'll approach you rather quickly. When he gets about 1-2 centimeters away,
jump in an arc pattern over him. He'll punch and miss, then turn around, and
punch and miss again. Just keep repeating this pattern. Keep jumping and
shooting until he gets within your radius, then leap over him, leap away, and
keep firing. You'll eventually defeat him after about 30-40 bullets. Very
intense though.
**END: The terrorist leader dies and explodes in a quick fury. You're then
brought to a cutscene showing what appears to be a planet (probably
Earth), and a space colony revolving around it. Apparently, Jay
survived and lived on to finish his father's dream of space colony
development. Now that the terrorist leader is gone, millions of lives
have been saved, and Jay has avenged his father's death.**
- From here on, the game resets back to level one with your previous
life/weapon meters. You do not get to use any of the new weapons gained
through the adventure in the earlier levels though. Congratulations, you have
completed one of the best action shooters for the NES.
-<>--<>--<>--<>--<>--<>--<>--<>--<>--<>--<>--<>--<>--<>--<>--<>--<>-
=============================
- 4) Codes -
=============================
As always, cheat codes are another way of expanding one's replayability inside
of an action game - especially shooting games. These codes give you a
heightened chance of completing the game with alternate weapons, new ways of
finishing off opponents, and just pure fun. This section will describe some of
the in-game codes available for the game. You'll also be able to find any game
genie codes for the title.
I'd like to thank:
http://www.gamewinners.com/
- for these useful codes.
______________
/In-Game Codes/
-=-=-=-=-=-=-=-=-=-=-=-=-=-=
CHEAT MODE >> Press B (33 times), then press START at the title screen.
You will then be brought to a screen that allows you to do
a sound test of the different songs, along with setting
yourself to have up to 9 continues.
SUPER WEAPON >> Press Up, Down, A, B, and START at the title screen. You
will start with a Doom Gun that allows you to kill all
enemies on screen at the sacrifice of 2 HP and 3 weapon
bars.
_________________
/Game Genie Codes/
-=-=-=-=-=-=-=-=-=-=-=-=-=-=
UNLIMITED LIVES >> SXNGYLVG
START W/ 9 LIVES >> PAOSOTLE
9 LIVES AFTER CONTINUE >> PEVIULLE
PROTECTION AGAINST ALIENS >> OTUVOZSV
SUPER JUMP >> TOOETOLA
-<>--<>--<>--<>--<>--<>--<>--<>--<>--<>--<>--<>--<>--<>--<>--<>--<>-
============================
- 5) Common Questions -
============================
)) Gameplay ((
----------------------------
<< Where can I obtain Journey to Silius? >>
- Your best choices are either eBay or at flea markets. Since this is an NES
game, it's not impossible to find. However, it's sort of very uncommon because
of its release with Sunsoft, and fairly low production count. It's not a
highly sought-after game, but should be if more people knew it was extremely
fun. It can be bought for about $3 on eBay.
<< How long have you been playing the game? >>
- To be honest, I believe I've owned the game ever since I was about 8. I
remember getting the Journey to Silius game for Christmas as a gift from my
relatives. Not only did it turn out to be one of my most famed games, but I
literally played it all day, and memorized most of the enemy positions. I
still remember to this day the first time I ever completed the game, without
cheating. So in total, it's been about 10 years I have owned the game.
<< Why is this your favorite NES game? >>
- The musical soundtrack is one of the most supreme you will hear across the
internet. You'll get numerous songs full of intense technoish beats that draw
the gamer closer to wanting to complete the game. Not only that, but it is a
fun shooter. The game was originally designed to be The Terminator, but
because of licensing problems, the developers had to resketch their ideas.
Rather than scrapping the entire project, they took what they had, and
adapted. Journey to Silius is a fun shooting game with responsive controls,
and alternating weapons. This is no generic Rambo, if you know what I mean.
-<>--<>--<>--<>--<>--<>--<>--<>--<>--<>--<>--<>--<>--<>--<>--<>--<>-
======================================================
- 6) Copyright/Distribution/Reproduction Guidelines -
======================================================
This FAQ/Strategy Guide/Walkthrough is my own published work, and copyrighted
by Christopher Zawada. Whatever you do, DO NOT edit this FAQ in any way. DO
NOT steal anything from this FAQ. If you want to use some information in your
own guide, simply ask me. If you want to place this guide on your website,
either link to the GameFAQs game page, or download the file and place it on
your own web server. Basically, you can post this on your website as long as
its in ORIGINAL form, and not linking directly to GameFAQs. Aside from that,
all proper credit is due when necessary. Also, don't even think about selling
FAQs. Trying to prosper off of other people's work will get you in big time
trouble (coming from an eBay seller myself).
This is a list of the current known sites that host my FAQs:
- http://www.gamefaqs.com/
- http://www.ign.com/
- http://www.neoseeker.com/
- http://www.cheatcc.com/
- http://www.cheatplanet.com/
-<>--<>--<>--<>--<>--<>--<>--<>--<>--<>--<>--<>--<>--<>--<>--<>--<>-
============================
- 7) Proper Credit -
============================
I'd like to thank the following people for their help in making this FAQ
possible:
)) CJayC (( for constantly updating GameFAQs, and dedicating his entire life
to it. Takes a lot of effort to keep a site going this long.
)) Gamewinners (( for providing useful codes to one of my favorite NES games
out there. Even the Game Genie codes blow it out of water, and provide a more
enhanced experience.
)) Sunsoft (( for producing a masterpiece of a title. Not only was the game
fun, but it really had a certain "feeling" that made it unique when compared
to my other NES titles.
)) Luck (( for messing up The Terminator license, and altering the game's fate
so that it became Journey to Silius. Maybe the game would have never been so
great had it turned out to be another movie-to-game clone.
"Some people make sacrifices to make other people happy." - Chris Zawada
"Freeeeeeddooommmmmmmmm!" - William Wallace (Braveheart)